Key Takeaway:
General-purpose AI resets every session, but Claude Code Skills act like a permanent operations manual — install once, and your AI already knows your workflow, style, and domain expertise, saving you time every single time.
Table of Contents
The Problem with General-Purpose AI
If you’ve used ChatGPT, Claude, or any modern AI assistant, you’ve felt their power — and their friction. Every new conversation starts from zero. The model doesn’t know your preferred writing style, your industry’s terminology, or the format that worked well last time.
Imagine asking an AI to write a newsletter article. You probably type something like:
“Write a newsletter article about time management. Make the opening gripping, divide the body into 3–4 clear sections, end with a memorable one-liner, keep the tone warm but not cheesy, target length 800 words…”
Two minutes spent writing instructions. The AI produces a draft. You ask for a revised opener. Three more rounds. The piece is finally good — but next week you’ll do the whole thing again from scratch.
Large language models are generalists. They are extraordinarily capable, but they don’t specialise automatically. That’s the gap Skills exist to close.
What is Claude Code?
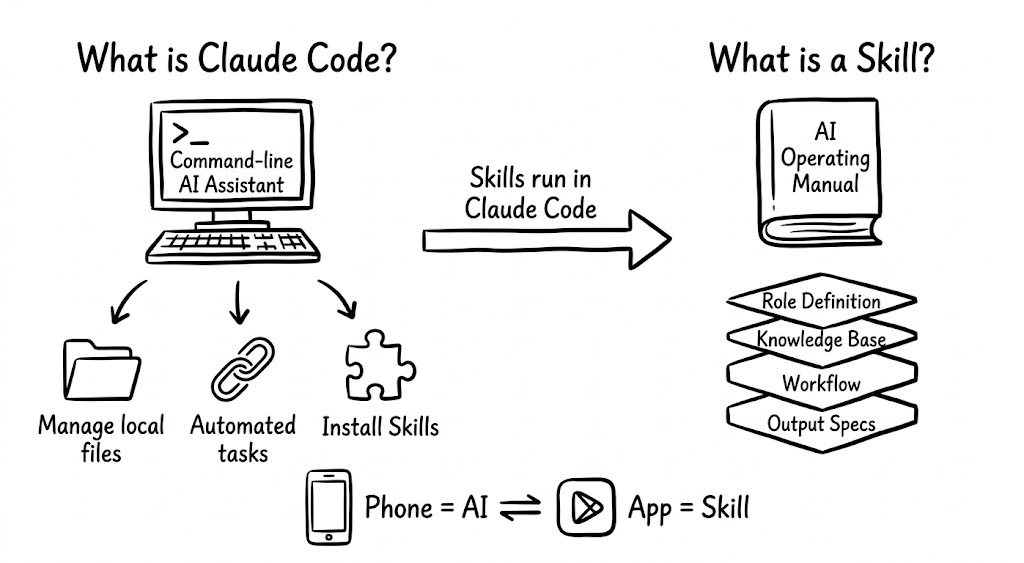
Claude Code is the official command-line tool published by Anthropic (the company behind the Claude family of models). Unlike the web interface at claude.ai, Claude Code runs on your machine, giving it capabilities the browser version simply cannot offer.
Why a command-line tool?
“Command line” sounds intimidating, but it just means you type instructions instead of clicking. Everything you need to type in this guide is provided verbatim — copy, paste, press Enter.
Claude.ai (web) vs Claude Code (local)
| Capability | claude.ai (web) | Claude Code (local) |
| Access your local files | ✗ No | ✓ Yes |
| Automate multi-step tasks | ✗ Limited | ✓ Yes |
| Install & run Skills | ✗ No | ✓ Yes |
| Works without a browser | ✗ No | ✓ Yes |
| Choose your own AI model | ✗ Limited | ✓ Yes |
What are Skills?
A Skill is a packaged set of instructions, domain knowledge, and workflow guidance that you install into Claude Code — like an app for your AI.
Think of onboarding a brilliant but inexperienced new hire. They’re smart and fast, but they’ve never worked in your industry. The fastest way to get great output is to hand them a thorough operations manual.
The Skill as an Operations Manual: A Skill file typically encodes the AI’s role and persona, a curated knowledge base of best practices, a step-by-step workflow for completing the task, output format specifications, and reference examples.
When you load a Newsletter Writing Skill, the AI already knows your article structure, your preferred opener styles, word-count norms, and formatting conventions — you just say “write me a piece about time management.”
Two prerequisites
Before you can use a Skill, two things must be in place:
01 — Claude Code installed on your computer Skills live inside Claude Code. Without it, there’s nowhere to load them.
02 — A connected large language model Claude Code is a shell; it needs an AI “brain” to think with. You’ll connect one in Step 3.
Preparation: What You Need Before Installing
Now that you understand what Claude Code and Skills are, let’s be clear about what needs to be in place before you can use a Skill. There are two hard prerequisites:
Prerequisite 1 — Install Claude Code
Skills run inside Claude Code — just like apps run on a phone. So your first job is to get Claude Code onto your computer.
💬 Note: Besides Claude Code, there are open-source alternatives like OpenCode that can also run Skills. This guide focuses on Claude Code because it’s the official tool and offers the best stability and compatibility.
Prerequisite 2 — Configure a Language Model
This is the step most beginners overlook. Claude Code is just a shell — it needs a large language model connected to it before it can do anything. Think of Claude Code as a smart body, and the language model as its brain. Without a brain, the body is useless.
You can connect different “brains”:
- 🧠 Anthropic’s official Claude models (also available via domestic relay services)
- 🧠 Domestic models like DeepSeek, Kimi, MiniMax, or Qwen
- 🧠 Various models via OpenRouter as a relay
We’ll walk through the configuration in detail in Step 3.
Don’t let the “technical feel” intimidate you
If you’ve never used a command line before, seeing the steps ahead might make you a little anxious — a black window with white text, cryptic English commands, walls of scrolling output…
But here’s the truth: it’s far simpler than it looks. You don’t need to understand what any of the commands mean. All you need to do is:
1 Open a program called “Terminal” (or “PowerShell” on Windows)
2 Copy the command I give you and paste it in
3 Press Enter
That’s it. It’s no different in practice from copying and pasting a piece of text. If you can place an online order or install an app on your phone, this guide holds no difficulty for you whatsoever.
How this guide is designed
- macOS and Windows covered separately — the steps differ between systems; just read your own section.
- Every step has a clear verification method — after each action, I’ll tell you exactly what a successful result looks like.
- Common problems flagged in advance — wherever things are likely to go wrong, I’ll warn you ahead of time and explain the fix.
First: open your Terminal
Before installing anything, you need to open the command-line program on your computer. It goes by different names depending on your OS:
- Mac: called Terminal
- Windows: called PowerShell (preferred over the older Command Prompt)
macOS — How to open Terminal
Method 1: Spotlight Search (recommended)
- Press Command (⌘) + Space — a search bar appears
- Type Terminal
- Press Enter — Terminal opens
Method 2: From Applications
- Open Finder
- Click Applications in the left sidebar
- Search for Terminal and open it
What you’ll see:
Last login: Mon Jan 20 10:30:00 on ttys000
yourname@MacBook ~ %
The cursor blinks after the % or $ symbol, waiting for your input.
Windows — How to open PowerShell
Windows has two command-line tools: Command Prompt and PowerShell. Use PowerShell — it’s more powerful and better supported.
Method 1: Start Menu Search (recommended)
- Click the Windows icon in the bottom-left corner
- Type PowerShell
- Click Windows PowerShell in the results
Method 2: Right-click the Start button
- Right-click the Windows icon in the bottom-left corner
- Select Windows PowerShell from the menu
What you’ll see:
Windows PowerShell
Copyright (C) Microsoft Corporation. All rights reserved.
PS C:\Users\YourName>
The cursor blinks after the > symbol, waiting for your input.
Step 1 — Install Node.js
Claude Code is built on Node.js, a widely used JavaScript runtime. You install it once and never think about it again.
macOS
- Visit nodejs.org, click Get Node.js, download the macOS .pkg installer.
- Double-click the downloaded file and follow the wizard (keep all defaults).
- Open Terminal (⌘ + Space → type “Terminal” → Enter) and verify:
node -v
npm -v
Both commands should print a version number (e.g. v22.4.1 and 10.7.0). ✓
Windows
- Visit nodejs.org, click Get Node.js, download the Windows .msi installer.
- Run the installer. When prompted about “Tools for Native Modules,” check that box.
- Close and reopen PowerShell, then verify:
node -v
npm -v
Both commands should print version numbers. ✓
⚠️ Seeing “command not found”? Close your terminal/PowerShell completely, reopen it, and try again. If the problem persists, restart your computer — this resolves most PATH-related issues.
Step 2 — Install Claude Code
With Node.js in place, installing Claude Code is a single command:
npm install -g @anthropic-ai/claude-code
You’ll see lines of output scroll past — that’s normal. When your prompt returns, installation is done.
Verify the installation
claude –version
A version string confirms success. Now launch Claude Code: claude
On first launch you’ll be asked to accept the terms of service and optionally log in with an Anthropic account. If you don’t have one — or prefer a different model — skip the login step for now; we’ll connect a model in the next section.
💡 Slow download or connection errors? Claude Code’s npm package is hosted on Anthropic’s servers. In some regions, a VPN may be needed to complete the installation. Once installed, you can use domestic LLM providers without one.
Step 3 — Configure Your Language Model
Claude Code is the body; a large language model is the brain. You tell Claude Code which AI service to use via two pieces of information: an API Base URL (the service’s address) and an API Key (your personal access token).
Recommended tool: CCSwitch
CCSwitch is a free open-source utility that gives you a friendly interface for managing Claude Code’s model configuration — no manual file-editing required. Download the release for your OS from the GitHub releases page, install it, then run:
ccswitch
Option A — Domestic providers (recommended for beginners)
These services work without a VPN and have generous free tiers or low-cost plans:
| Provider | Model | API Key URL |
| MiniMax | MiniMax-M2.1 | platform.minimaxi.com |
| Moonshot (Kimi) | kimi-k2-turbo-preview | platform.moonshot.cn |
| Alibaba Qwen | Qwen3-Coder-Plus | bailian.console.aliyun.com |
| Zhipu AI (GLM) | GLM-4.5 | bigmodel.cn |
After getting your key, use CCSwitch to add a new configuration — paste the key, select the provider, and save. Or configure manually:
macOS (MiniMax example):
export ANTHROPIC_BASE_URL=”https://api.minimaxi.com/anthropic”
export ANTHROPIC_API_KEY=”your-api-key-here”
export ANTHROPIC_MODEL=”MiniMax-M2.1″
To make these permanent, append the same lines to ~/.zshrc then run source ~/.zshrc.
Windows (MiniMax example):
$Env:ANTHROPIC_BASE_URL=”https://api.minimaxi.com/anthropic”
$Env:ANTHROPIC_API_KEY=”your-api-key-here”
$Env:ANTHROPIC_MODEL=”MiniMax-M2.1″
For permanent settings, add these variables via System Properties → Environment Variables.
Option B — Anthropic official (claude.ai subscribers)
If you have an active Claude.ai subscription or API account, start Claude Code and choose “Log in” — a browser window opens for OAuth authentication. Once authorised you’re ready to go.
Verify your model is connected
Launch Claude Code and ask a simple question:
claude
> Hello! What model are you?
If the AI responds coherently, you’re set. 🎉
⚠️ Common errors:
- Invalid API Key — re-copy your key (no trailing spaces)
- Connection refused — check the Base URL
- Insufficient quota — top up your account balance on the provider’s dashboard
Skills vs. Prompts: What’s the Real Difference?
You might wonder: couldn’t I just write a detailed system prompt and get the same result? Technically, yes — for a single session. But Skills solve a different problem: repeatability at scale.
When to use a plain prompt
- One-off, exploratory tasks
- You’re not sure what you want yet
- Simple tasks needing no expertise
- No plan to repeat the task
When to use a Skill
- Tasks you repeat regularly
- Work requiring domain expertise
- Consistent output quality matters
- You want to share the capability
Five-dimensional comparison
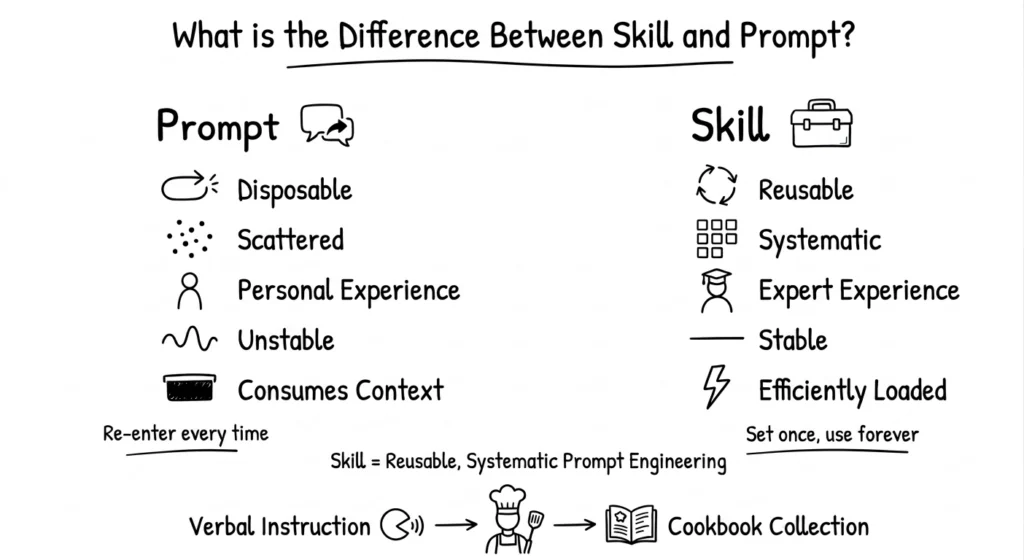
| Dimension | Ad-hoc Prompt | Skill |
| Reusability | One session only | Install once, use forever |
| Coverage | What you remember | Systematically complete |
| Knowledge source | Your expertise | Domain expert’s expertise |
| Output consistency | Variable | Stable and predictable |
| Context efficiency | Consumes tokens | Optimised loading |
The analogy that sticks: prompts are like telling a chef verbally what to cook each time. A Skill is the recipe book — every dish, every technique, every plating note, written down once and available whenever you need it.
Where Skills live on your computer
Claude Code stores Skills in a hidden folder:
- macOS: ~/.claude/skills/
- Windows: %USERPROFILE%\.claude\skills\
Each Skill is a folder containing a SKILL.md file — the “operations manual” the AI reads when you invoke that Skill.
Step 4 — Download & Use Your First Skill
Ready-made Skills are published on skills.fan, a community catalogue for knowledge workers. Think of it as an app store for AI capabilities.
Step 1: Find a Skill
Visit skills.fan, browse or search the catalogue, and open a Skill page. For this walkthrough we’ll use Topic Generator — a Skill that produces content ideas for creators.
Step 2: Download and unzip
Click Download on the Skill’s detail page. You’ll get a .zip file. Extract it — you’ll find a folder named something like topic-generator.
Step 3: Copy the folder to your Skills directory
Move or copy the unzipped folder to:
- macOS: ~/.claude/skills/topic-generator/
- Windows: %USERPROFILE%\.claude\skills\topic-generator\
Alternatively, ask Claude Code to install it:
Install the skill in my Downloads folder named topic-generator.
Step 4: Invoke the Skill
Launch Claude Code and describe your task naturally:
I’m an AI blogger. The Skills feature is trending —
use the topic-generator Skill to give me some content ideas.
You should see: Skill(topic-generator) — Successfully loaded skill
✨ Pro tip: If a Skill asks you follow-up questions (audience, goal, quantity…) and you just want to see what it can do, reply: “Go ahead and generate.” Good Skills are designed to work with sensible defaults.
Example output from Topic Generator
Here’s a condensed sample of what the Skill produced in one session for an AI blogger wanting content around Skills:
High-potential topics (prioritise this week)
- #1 — “Anthropic drops a game-changer: Skills turns AI into your dedicated specialist” — Hot take · Publish now · Easy
- #2 — “I tested 50 Skills over 3 days — here are the 10 that changed how I work” — Curated list · 1–2 wks · Medium
- #3 — “Stop rewriting the same prompt. One Skill replaces 100 instructions.” — Pain-point hook · 2 wks · Easy
Growth topics
- #4 — “Build your first Skill from scratch: zero-to-publish tutorial”
- #5 — “How I automated 80% of my content workflow with 6 Skills”
- #6 — “Skills vs GPTs vs Coze: the honest comparison”
Each card came with a difficulty rating, recommended publish timing, required assets, and a unique angle — all from a single, natural-language request.
Bonus: Take It Further with Gaga AI — The All-in-One AI Video Generator
Once your Claude Code workflow is running smoothly, the natural next step is adding a visual and audio layer to your content. Gaga AI is an all-in-one AI video creation platform that pairs powerfully with Skills-driven workflows — turning your text and image outputs into polished, production-ready video content.
Here’s what Gaga AI brings to the table:
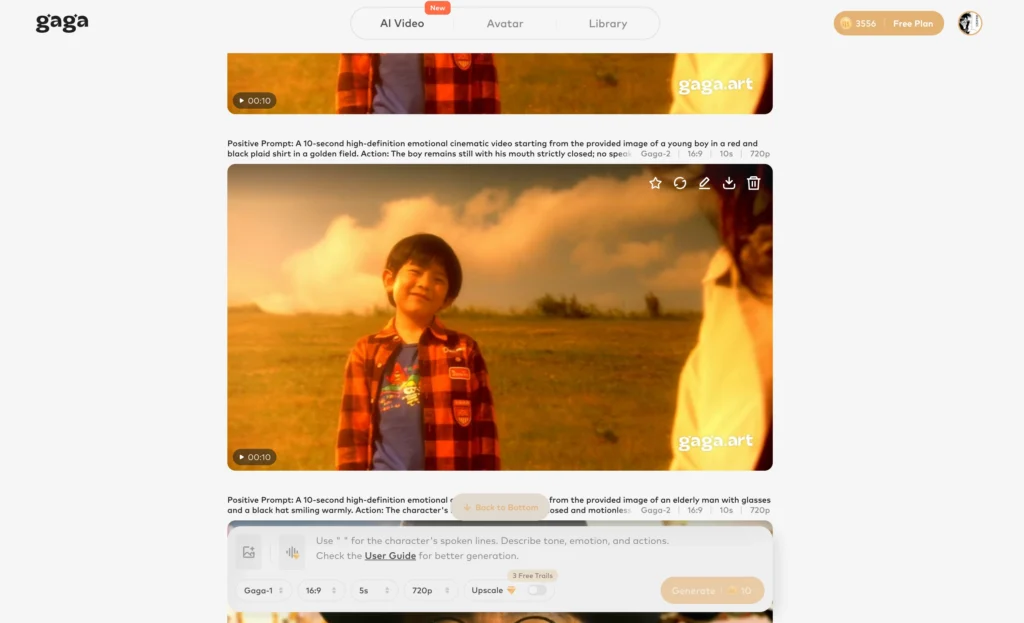
Image to Video AI
Upload any still image and Gaga AI animates it into a fluid, high-quality video clip. Whether it’s a product photo, an illustrated scene, or an AI-generated image from your Claude Code workflow, the engine adds motion, depth, and cinematic life — no editing skills required.
Video and Audio Infusion
Gaga AI lets you layer custom audio directly onto existing video footage. Drop in background music, sound effects, or a voiceover track and the platform syncs everything automatically. The result is a cohesive, broadcast-ready clip that sounds as good as it looks.
AI Avatar
Choose from a library of photorealistic AI avatars — or generate one built around your own likeness. The avatar delivers your script on camera with natural gestures and lip-sync, making it ideal for explainer videos, product walkthroughs, and social content without ever needing to appear on screen yourself.
AI Voice Clone
Record a short sample of your voice and Gaga AI builds a personal voice model from it. From that point on, any text you feed the system is read back in your own voice — same tone, same cadence, same personality. Useful for scaling narrated content without recording new audio every time.
Text to Speech (TTS)
No voice sample? No problem. Gaga AI’s TTS engine converts written text into natural-sounding speech across dozens of languages and voice styles. Pick a voice profile that fits your brand and generate professional voiceovers in seconds.
How it fits your Skills workflow: Generate a structured script or content brief with a Claude Code Skill → paste it into Gaga AI → select an avatar and voice → export a finished video. The entire pipeline from idea to publishable video can run in under 15 minutes.
✨ Tip: Use a Claude Code writing Skill to draft your video script first — consistent structure, the right word count, and a clear call to action — then hand it off to Gaga AI for production. The two tools are designed for exactly this kind of handoff.
Frequently Asked Questions
Q. Do I need to pay to use Claude Code?
Claude Code itself is free to download. You do need an account with an LLM provider (Anthropic, MiniMax, Moonshot, etc.) — most offer generous free tiers. You pay for API usage, not for Claude Code.
Q. Can I use Claude Code on Windows?
Yes. This guide covers both macOS and Windows throughout. The commands differ slightly (PowerShell vs Terminal) but the process is identical.
Q. Is it safe to paste my API Key into the terminal?
Your key is stored locally in your environment variables or the CCSwitch config file — it never leaves your machine except when making authorised calls to the API provider you chose. Treat it like a password: don’t share it or commit it to public repositories.
Q. Where can I find more Skills?
The primary catalogue is skills.fan. Skills are also shared on GitHub and community forums. Because a Skill is just a folder with a markdown file, you can also create your own.
Q. What’s the difference between a Skill and a custom system prompt?
A system prompt is a one-time, in-session instruction. A Skill is a persistent, shareable, version-controlled knowledge package. Skills are also structured to be reusable across multiple LLMs and sessions, whereas a system prompt lives only in the conversation you paste it into.
Q. Can I use Skills with models other than Claude?
Yes — Claude Code supports any OpenAI-compatible API endpoint. Skills work the same way regardless of which model is powering Claude Code.
You now have a specialist AI assistant.
In the past hour you installed Claude Code, connected it to a language model, and ran your first Skill. The next step is to visit skills.fan, find a Skill that matches something you do regularly, and actually use it — once is enough to feel the difference.
Each Skill might save you 5–10 minutes per task. Stack ten of them and run them daily, and the compound effect becomes significant. More importantly, you stop fighting the tool and start relying on it.
Related Posts:
 Mastering the Prompt: The Ultimate Guide to Gaga AI Video Generation
 Midjourney Video Generator: The Ultimate Guide, Prompts, and the Best AI Alternative
 The Complete Guide to Stable Diffusion AI Video: From Image Generation to Advanced Video Creation