Key Takeaways
- Bringing photos to life transforms static images into animated videos using AI technology that adds movement, expressions, and transitions
- Free and premium AI tools like Gaga AI, Runway AI, and Vidu AI can animate photos in seconds without technical skills
- You can bring old photos to life by restoring them first, then applying animation effects to create emotional video stories
- Modern AI generators analyze facial features, depth, and context to create natural-looking motion from still images
- The technology works for personal memories, marketing content, and creative storytelling across platforms
Table of Contents
What Does It Mean to Bring Photos to Life?
Bringing photos to life means converting static images into dynamic videos using artificial intelligence that generates realistic movement, facial expressions, and scene transitions. The technology analyzes your photo’s composition, identifies key elements like faces and objects, then creates smooth animations that make subjects appear to move, breathe, or interact naturally.
This process differs from simple slideshows because AI actually generates new frames between your original image and predicted motion states. When you bring photos to life with AI, the algorithms predict how a person might move their head, how fabric might flow, or how backgrounds might shift based on depth perception and learned patterns from millions of video examples.
How to Bring Photos to Life: Step-by-Step Process
Step 1: Choose Your AI Photo Animation Tool
Select a platform based on your specific needs—free options for basic animation or premium tools for advanced control over motion and effects.
Best tools to bring photos to life:
- Gaga AI – Specializes in facial animation with natural expression generation
- Runway AI – Professional-grade motion control with custom parameters
- Kling AI – Excels at full-body movement and scene animation
- Vidu AI – Fast processing with good results for social media content
- Veo 3.1 – Advanced physics simulation for realistic fabric and hair movement
Step 2: Prepare Your Image
High-quality source images produce better animations. For optimal results:
- Use images with resolution of at least 1080p
- Ensure faces are clearly visible and well-lit if animating portraits
- Remove heavy filters or extreme edits that might confuse the AI
- For old photos, consider restoration first using AI enhancement tools
Step 3: Upload and Configure Animation Settings
Most platforms follow this workflow:
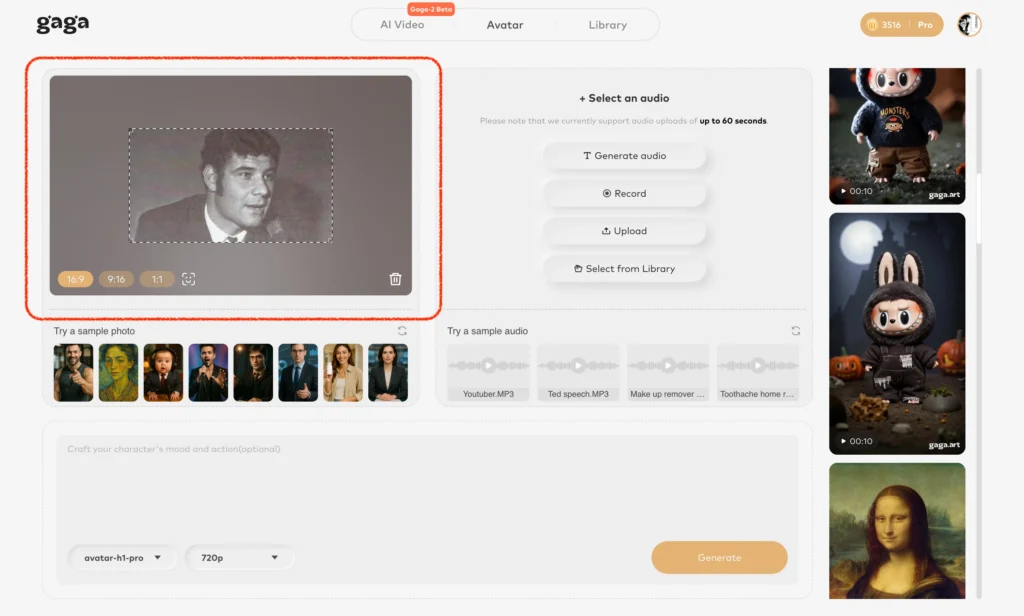
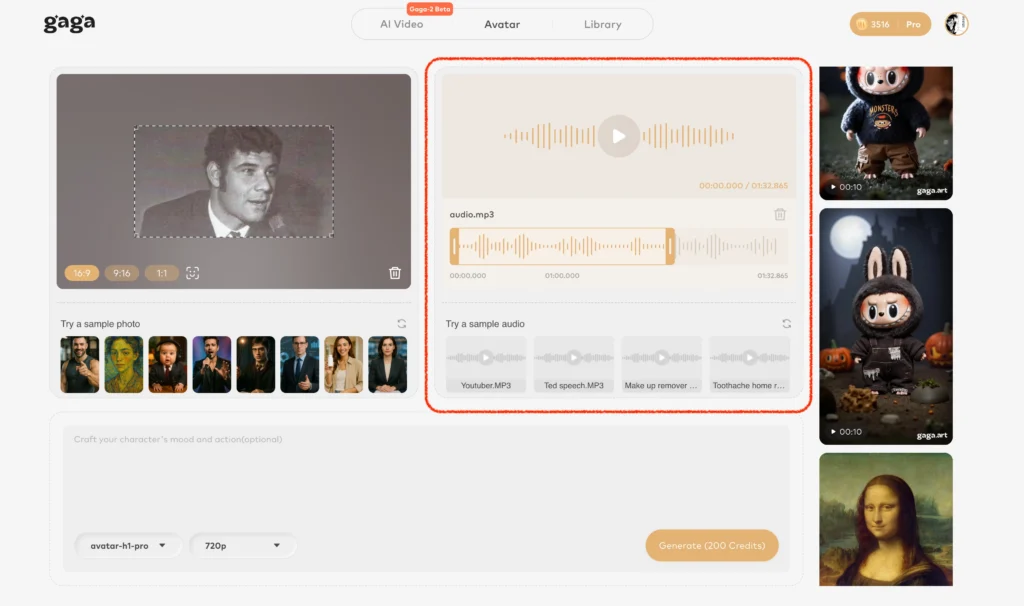
1. Upload your photo to the platform
2. Select animation style (subtle, dynamic, or custom)
3. Choose duration (typically 2-10 seconds)
4. Set motion intensity and direction if available
5. Preview the generated animation
6. Download in your preferred format (MP4, GIF, MOV)
Step 4: Refine and Export
After the initial generation:
- Review the animation for unnatural artifacts
- Adjust settings and regenerate if needed
- Add music, captions, or transitions in post-processing
- Export in appropriate resolution for your intended use
How to Bring Old Photos to Life Free
Free AI tools can bring old photos to life through a two-step process: restoration followed by animation. While premium services offer more features, several platforms provide capable free tiers.
Free Tools for Photo Animation
Vidu AI Free Tier offers 3 animations per day with watermarks. The results work well for personal projects and social media posts where slight branding is acceptable.
Runway AI Free Trial provides limited credits for testing professional-grade animation. You’ll get 125 credits initially, with each animation costing 5-10 credits depending on duration.
Kling AI Community Version allows basic animations with queue wait times. The trade-off is processing speed, not quality—free users simply wait longer for results.
Process for Animating Old Photos
1. Restore first: Use free restoration tools like Remini or MyHeritage to enhance image quality, fix damage, and improve resolution
2. Convert to color: If working with black-and-white photos, colorization adds realism to animation (tools like Palette.fm offer free processing)
3. Animate: Upload the restored image to your chosen animation platform
4. Add context: Consider creating a photo to story generator output by combining multiple animated photos with narration
Turn Photo Into Video Story: Creative Applications
Creating photo-to-story videos combines multiple animated images with narrative elements like voiceover, text, and music to build compelling visual stories. This technique transforms static photo collections into engaging content.
Building Narrative Photo Stories
Start with a storyboard approach:
1. Select 5-10 key photos that represent your story’s progression
2. Animate each image using consistent settings for visual coherence
3. Sequence animations with transitions in video editing software
4. Add narration or text that provides context and emotional connection
5. Include music that matches the mood and pacing
Photo to Story Generator Applications
Personal memoirs: Animate childhood photos with voiceover memories for family archives
Business storytelling: Show company evolution through animated photos of key moments, founders, and milestones
Educational content: Bring historical photos to life for more engaging lessons about past events
Social media content: Create attention-grabbing posts that stand out in crowded feeds
Memorial tributes: Honor loved ones by animating cherished photos for funeral services or remembrance videos
Comparing Top AI Tools to Bring Photos to Life
#1 – Gaga AI: Best for Facial Animation
Gaga AI excels at creating natural facial expressions and head movements from portrait photos. The platform uses advanced emotion modeling to generate believable expressions.
Strengths: Exceptional lip-sync capabilities, natural eye movement, subtle micro-expressions
Best for: Portrait animation, social media avatars, character development
Limitations: Less effective for full-body or landscape images
#2 – Runway AI: Professional Control
Runway AI provides the most granular control over animation parameters, making it ideal for professional creators who need specific results. The platform integrates with creative workflows.
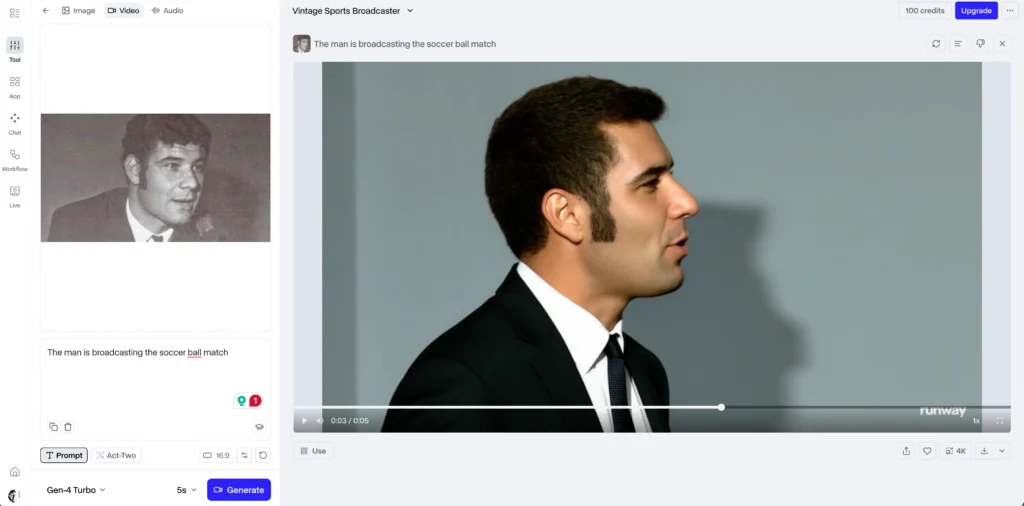
Strengths: Custom motion brushes, precise timing control, professional export options
Best for: Commercial projects, artistic control, integration with existing workflows
Limitations: Steeper learning curve, higher cost
#3 – Sora: Cinematic Quality (Limited Access)
Sora by OpenAI generates highly realistic animations with understanding of camera movement and cinematic techniques. Access remains limited as of early 2026.
Strengths: Understanding of 3D space, physics simulation, scene coherence
Best for: High-end content creation when access is available
Limitations: Restricted availability, longer processing times
#4 – Kling AI: Full Scene Animation
Kling AI handles entire scenes well, not just subjects, making it ideal for landscape and group photos. The platform balances quality with processing speed.
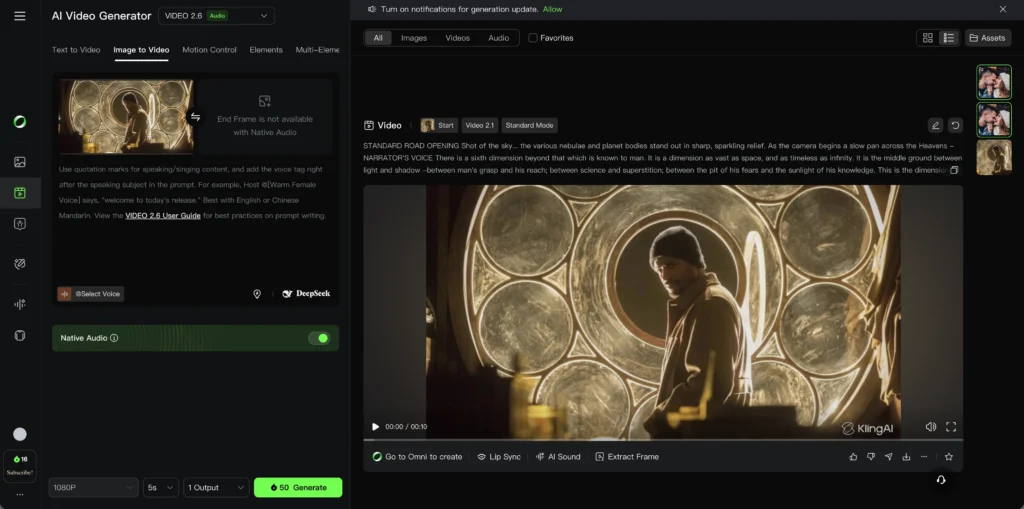
Strengths: Scene-wide coherence, good with multiple subjects, reasonable pricing
Best for: Family photos, group shots, landscape animation
Limitations: Facial details slightly less refined than specialized portrait tools
#5 – Vidu AI: Speed and Efficiency
Vidu AI prioritizes fast processing and social media optimization, generating animations in under a minute. The platform offers mobile-friendly outputs.
Strengths: Fast generation, mobile app availability, social media presets
Best for: Quick social content, mobile creation, high-volume needs
Limitations: Fewer customization options, shorter maximum duration
#6 – Veo 3.1: Physics Realism
Veo 3.1 from Google focuses on realistic physics simulation for fabric, hair, and natural elements. The system produces animations where clothing and hair move naturally.
Strengths: Physics accuracy, fabric simulation, natural element movement
Best for: Fashion, outdoor scenes, dynamic poses
Limitations: Newer platform with evolving feature set
Best Practices for Natural-Looking Animation
Choosing the Right Photos
Photos with clear subjects, good lighting, and straightforward compositions animate more successfully than busy, dark, or blurry images. Consider these factors:
- Facial clarity: Eyes should be visible and in focus for portrait animation
- Lighting: Even lighting produces better depth mapping than harsh shadows
- Composition: Centered subjects with defined boundaries work best
- Resolution: Higher source resolution allows for better quality output
- Pose: Natural poses animate more realistically than extreme or unusual angles
Setting Appropriate Expectations
Not every photo needs dramatic motion. Subtle animation often creates more believable results:
- For formal portraits: gentle head tilts, eye blinks, subtle breathing
- For action shots: slight continuation of existing motion direction
- For landscapes: gentle camera movement, atmospheric effects
- For old photos: conservative animation preserves authenticity
Avoiding Common Mistakes
Over-animation makes results look artificial. Start with minimal settings and increase gradually.
Ignoring context: Animation style should match the photo’s era and mood. Dramatic motion on a somber memorial photo feels inappropriate.
Poor source quality: No AI can fully compensate for extremely low-resolution or damaged original images. Restore first, then animate.
Skipping preview: Always preview before final export. Many platforms let you adjust and regenerate without additional costs.
Frequently Asked Questions
Can I bring photos to life for free?
Yes, several platforms offer free tiers for basic animation. Vidu AI, Kling AI community version, and Runway AI trials provide limited free animations. The results are suitable for personal use, though free versions typically include watermarks or have usage limits of 3-5 animations daily.
How do I bring old photos to life with the best results?
First restore and enhance old photos using AI restoration tools to improve clarity and fix damage. Then convert black-and-white images to color if desired. Finally, use conservative animation settings—subtle movement preserves the historical authenticity of old photos better than dramatic effects.
What’s the difference between photo animation and photo to story generators?
Photo animation creates movement in a single image, while photo to story generators combine multiple animated or static images with narrative elements like text, voiceover, and music to create cohesive video stories. Most creators use animation tools first, then sequence results in video editing software.
Do AI photo animation tools work on phones?
Yes, several platforms including Vidu AI and Kling AI offer mobile apps with full animation capabilities. Mobile versions typically have simplified interfaces but produce the same quality outputs as desktop versions. Processing happens on cloud servers, so phone performance doesn’t limit results.
How long does it take to bring a photo to life?
Processing times vary by platform and animation complexity. Simple animations generate in 30-90 seconds on fast platforms like Vidu AI. Complex animations with advanced settings on tools like Runway AI or Sora may take 3-5 minutes. Queue times on free tiers can add additional waiting.
Can I bring group photos or landscape images to life?
Yes, though results vary by tool. Kling AI and Veo 3.1 handle full scenes and multiple subjects well. Portrait-focused tools like Gaga AI work best on single subjects. For group photos, expect more natural results with conservative motion settings that move the entire scene rather than animating each person independently.
Will animating photos reduce their quality?
Modern AI tools maintain or slightly enhance resolution during animation. Export your animated video at the same or higher resolution as your source image. Most platforms offer exports up to 4K resolution. Quality loss typically comes from compression when sharing on social media, not from the animation process itself.
Are there copyright issues with animated photos?
You retain copyright of your own photos and their animated versions. However, animating photos you don’t own (like stock images or others’ work) without permission violates copyright. Always use photos you own or have explicit rights to animate and share.
How do I add sound or music to animated photos?
Most photo animation tools generate silent video. Add audio using video editing software like CapCut, iMovie, DaVinci Resolve, or Adobe Premiere. Import your animated video, add audio tracks, synchronize timing, and export the final result with combined video and audio.
Can professional photographers use this for client work?
Yes, many photographers offer photo animation as a premium service. Ensure your chosen platform allows commercial use (most paid tiers do). Disclose AI usage to clients, obtain model releases for animated content, and verify the platform’s commercial licensing terms before selling animated photos.